How to start with Recommendation Elements
Recommend the right products to each of your customers

Miriam from Kimonix
Last Update a year ago
In this article, we will look at how to quickly set up your store’s recommendation elements and monitor the results using the analytics section (Step 8).
Please read our blog post on the topic if you're unsure of what product recommendations are.
Let’s get started with the setup:
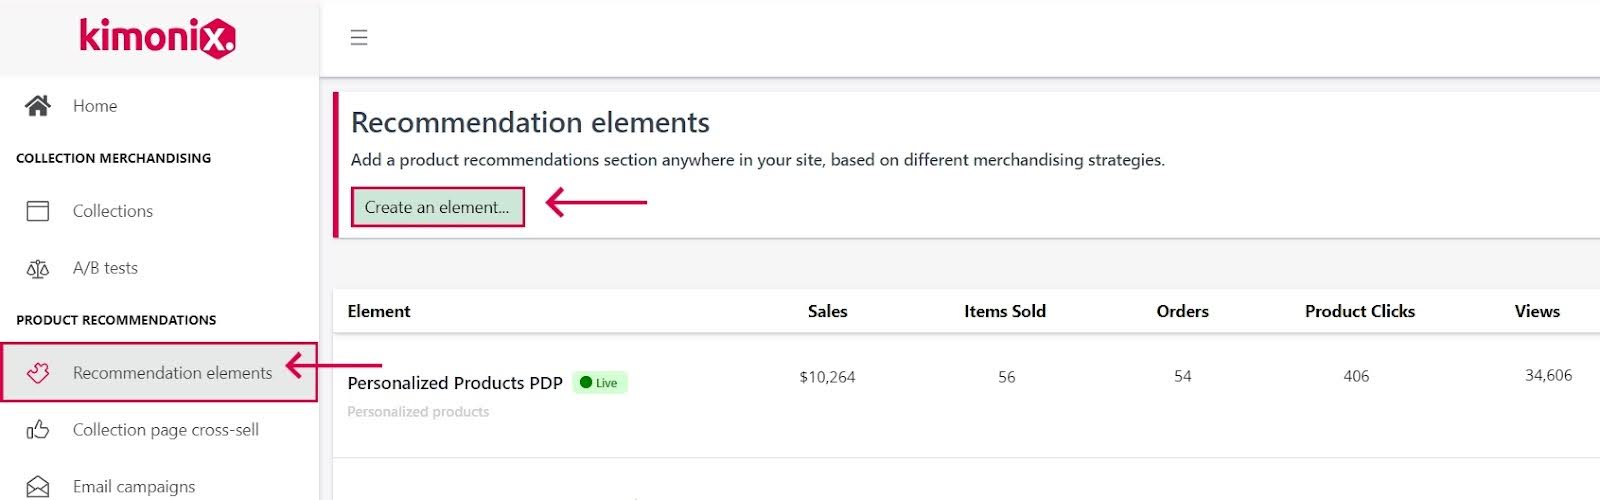
Step 1: Go to the “Recommendation Elements” page and then click on “Create an element”.
Don't worry, creating an element won't change anything in your store until you activate it [step 6].
Step 2: Select a template -> Create.
Choose a template based on your specific strategy: These are pre-made templates for 4 main strategies, usually used in recommendations. Once you choose a template, you will have the option to edit it based on your specific strategy needs.

- Personalized products: This template enables you to display 1:1 personalized recommendations. Each customer will get their own recommendations. These are based on their site activity, clicks, and the products they've viewed in both current and past visits. Our AI then analyzes this data in relation to the purchasing behavior of other shoppers who share similar interests. This ensures that the element suggests the most relevant products, increasing the likelihood of each customer making a purchase.
Frequently bought together: This template displays products that are often purchased alongside the product that the customer is already currently viewing. It's most relevant for the product page and relies on past orders data.
Similar Products: This template will display products that are similar to the product the customer is visiting. The similarity is determined by the product type, product title, and product tags. The products are sorted in a way that displays the most similar product first.
Recently viewed: This template will display products that the customer has recently looked at. This is from the moment you create the first element.
Step 3: Only for “Shopify Markets” users
Please follow the instructions below to enable “Shopify markets” in the app:
First, make sure you have the “Shopify markets integration” feature as part of your plan (this feature is part of the Superior plan, and you can activate it as needed.)
Click on your store name in the top right corner.
Click on Settings.

- Scroll down to the Shopify markets section, and make sure to turn on the Shopify markets integration toggle.

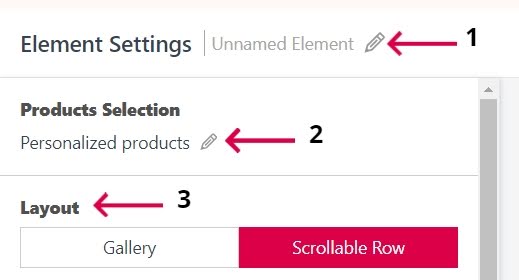
Click on the pencil icon to rename the element.
Choose a descriptive name. For example: "Personalized products PDP".
Click the green tick to save your element name.
2. Products Selection: This section determines which products the element will display for each customer. The default setup is based on the template you selected in step 2 and it can be edited just like a regular collection.
Note: this won’t create a collection on your collections page, and can only be managed through the elements page.
Here is how to edit the strategy:
Click the pencil icon to Edit.
The editing page will open (will look like a collection page) and here you can edit the element.
You have complete flexibility to create your own strategy based on the app's parameters. You can combine multiple strategies and set the exact one that will showcase the most suitable products to your customers.
Once you are happy with your changes, you can scroll down to the bottom of the page and click "Save".

You can adjust various layout aspects of your element, including its type (Scrollable row or Gallery), text, size, margins, color settings, and more.
You will be able to see a preview of your changes on the right side.
Step 5: How to Implement the element in your store.
Copy the code from the code box on the right-hand side.
Paste the copied code to a Liquid Code section in your Shopify admin

Note: You can add the element to the home page, collection page, product page and cart page/drawer.
Step 6: Test (optional)
After pasting the code in the right place in your Shopify Admin, go back to the elements page on the App.
Click the “Launch site in test mode” on the right-hand side, under the code for the element.
In the test mode, browse to the page that you've added the code on to.
For the personalization template, click and view a few products in order to test which product it will suggest
Step 7: Once you are satisfied with the result, activate the element to be live on your store's site. To do that, turn on the “Live on store's site” toggle that is shown under the test mode section.
Step 8: Save your element.
Scroll down and click on the "Save" or “Save & Exit” button.
Step 9: Analytics
Monitor the element performance using the analytics section.
You can monitor Sales (money), Items sold, Orders, Product Clicks, and Views. The data will be presented based on the period you choose.
Example Below (30 Days Period):

FAQ: How would it look on my store?
Here is an example of an element with a scrollable row layout >>
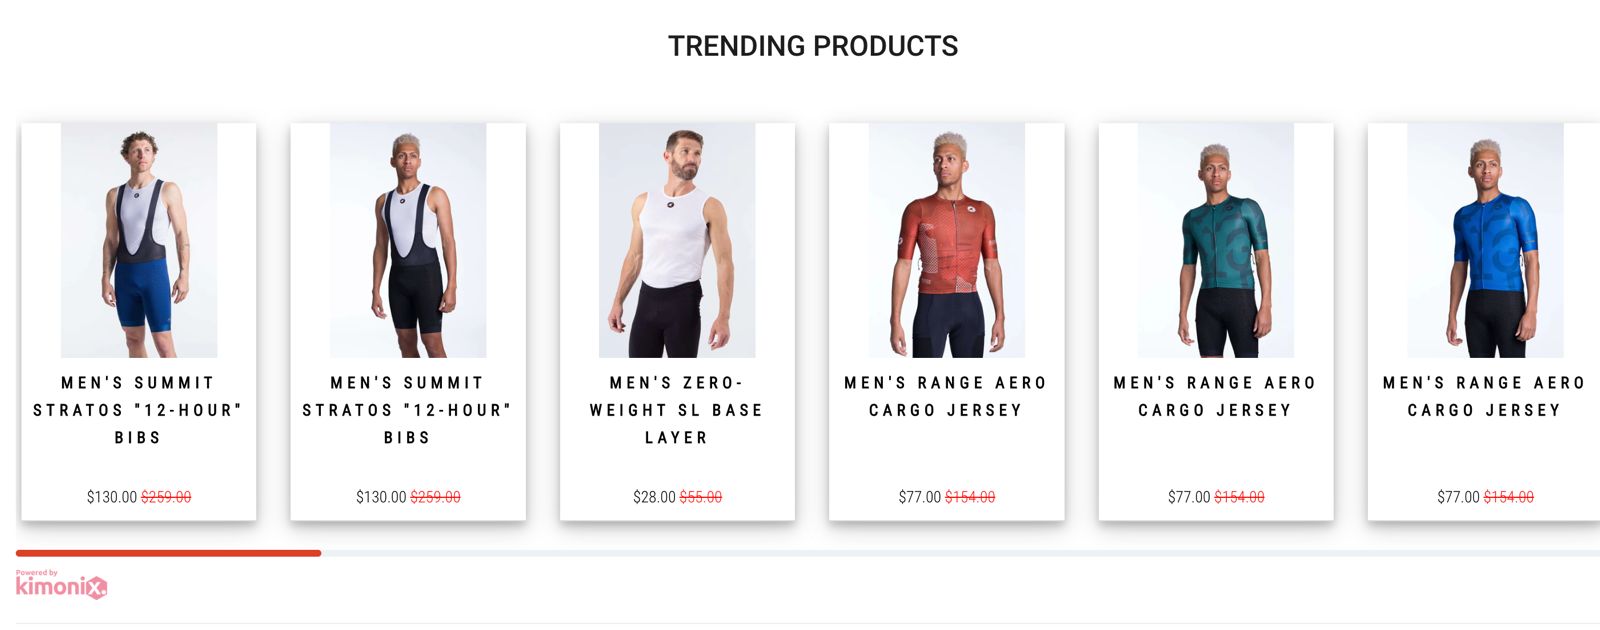
Congratulations, your element is live and is ready to boost your AOV and profits!
Have any feature requests? Need our help?
We are here --> Message us directly through this chat link.