How to set up your Collection Page Cross-Sell?
Learn how to activate the cross-sell tool to increase your AOV.

Stacey From Kimonix
Last Update 2 tahun yang lalu
What is the collection page cross-sell tool?
This tool is used to encourage customers to purchase products that are frequently bought together and can help increase your AOV (Average Order Value).
The tool will automatically show frequently bought-together product suggestions on all the products that have sufficient data and across all collections on your site.
Let’s get started:
Step 1: Start the setup
Go to the “Collection page cross-sell” section
Click on the green “Start setup” icon.
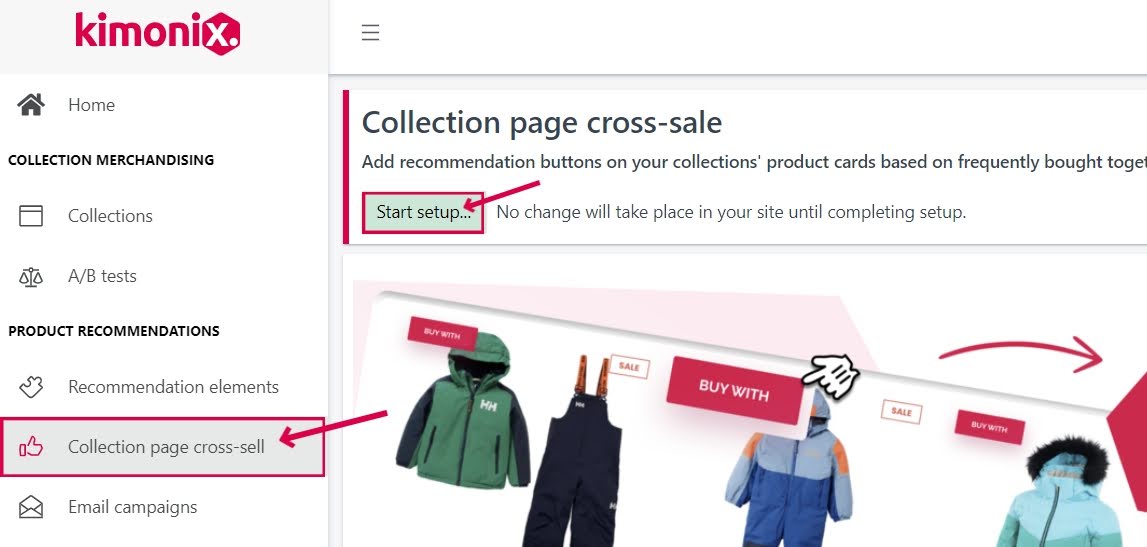
After you click on “Start setup”, a processing pop-up will appear. This may take a few minutes.

Good to know: This only loads the setup page. No changes will take place on your site even after the setup is complete.
Step 2: The setup page:
On the setup page, you will first see the analytics section (Step 8). This is where you can view all the data collected for the tool within the timeframe you set (it will automatically be set to 30 days which is recommended).
Next, you will see the Live on store’s site section (Step 5+6). This is where you can preview how the buttons and product suggestions will look on your site (by clicking the "See preview on site" button). This is also where you are able to choose to turn on the toggle for the tool to be live on your store’s site so that customers can see it.
Lastly, you have the option to configure the layout of your tool (Step 4). Here you can edit the Recommendations button, and the Recommendations popup, along with some additional settings.
Step 3 (Optional): Only for “Shopify Markets” users
Please follow the instructions below to enable “Shopify markets” in the app:
First, make sure you have the “Shopify markets integration” feature as part of your plan (this feature is part of the Superior plan, and you can activate it as needed).
Click on your store name in the top right corner.
Click on Settings.

Scroll down to the Shopify markets section, and make sure to turn on the Shopify markets integration toggle.

Now let's get started with configuring the layout:
Step 4: Layout configurations
Phase 1 - Recommendations button
Here you can change the button’s text, size, position, and colors. You can also see a preview (on the right-hand side) of how the button will look on the products in your store.
Phase 2- Recommendations popup configuration
Here you can change the text, alignment, and colors for the pop-up. You can also have an “add to cart” button.
Phase 3 - Additional Settings
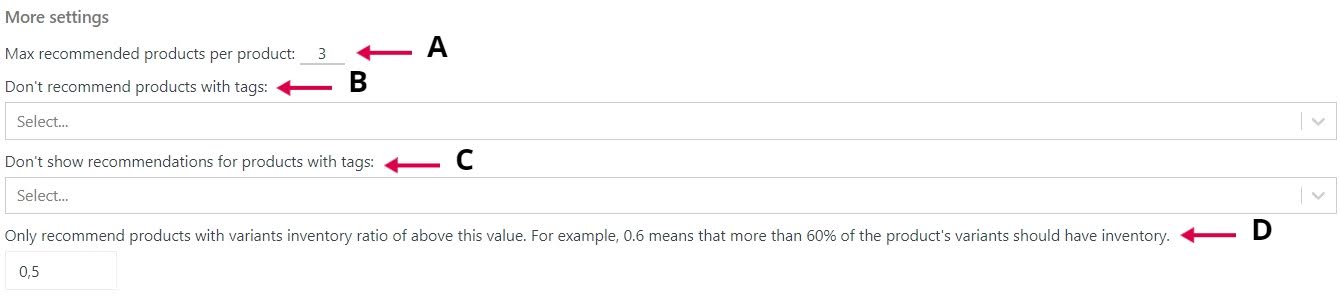
A. Set the limit on how many recommended products should be shown in the pop-up.
B. Exclude certain products from being recommended based on their tags.
C. Do not show any recommended products for products with certain tags.
D. Manage the variants inventory ratio limit.
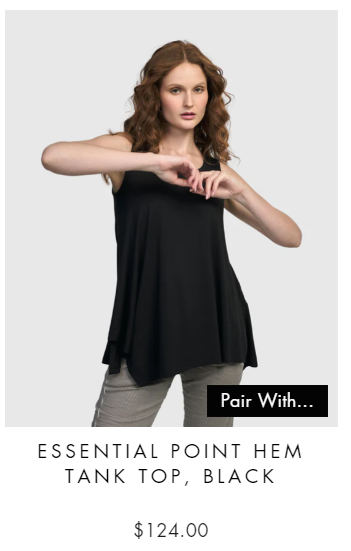
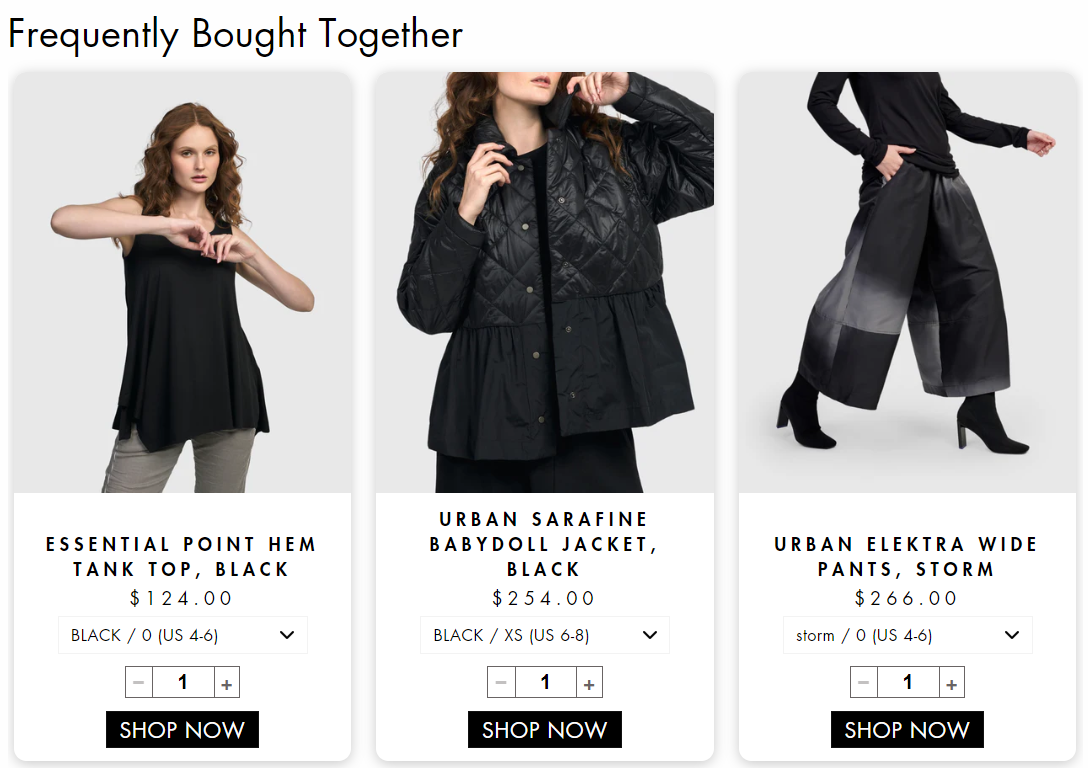
FAQ- How would it look in my store?
Below is an example of a product with a cross-sell button (bottom right placement). Then, there is an example of the configuration pop-up of the items that are frequently bought together with the first product after you click the “Pair With” button.
You can also do more customizations using the Shopify admin CSS by going to your online store > customize > theme settings (the gear wheel).
Step 5: Preview on site
After you are happy with the changes, preview how it will look on your site before going live. (optional)

Step 6: Set the tool to be live on your site, for all customers
Turn on the toggle for it to be live on your site.

Step 7: Save your cross-sell tool
Scroll down to the bottom of the page and click on the green "Save" button.
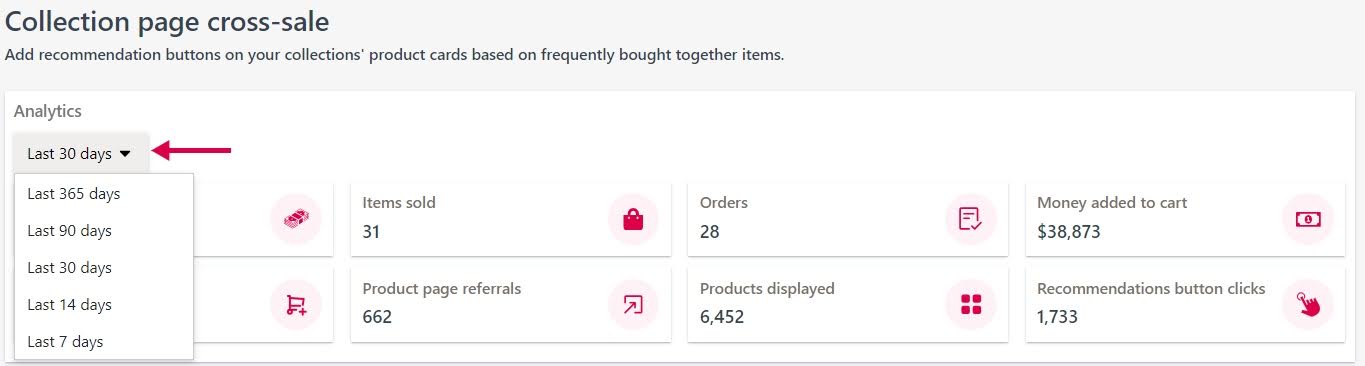
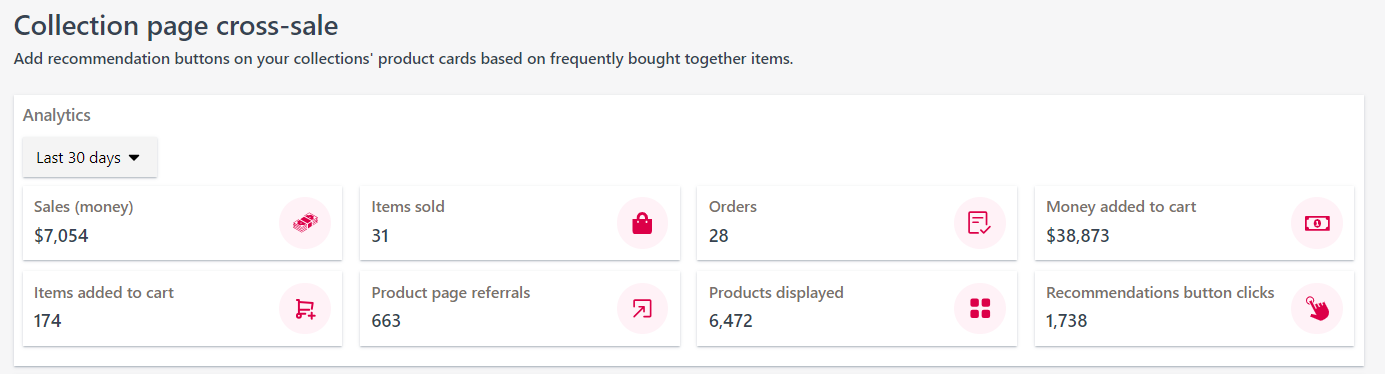
Step 8: Analytics
You can see the analytics of the tool at the top of the page so you monitor the tool’s performance. This is situated right at the top of the page and contains data like button clicks, sales (money), items added to cart, and money added to cart.
Example below (30 Days Period):
Congratulations, your cross-sell tool is live and is ready to increase your average order value!
Have any feature requests? Need our help?
We are here ➞ Message us directly through this chat link.